The main spars are complete. It’s time to prepare the wing rear spars. Here is a section of the plans that shows where the rear spar is on the left wing:
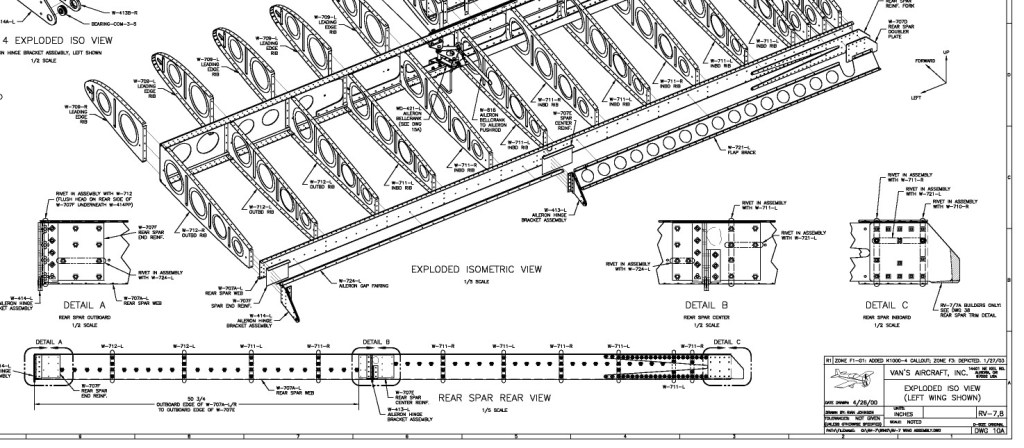
The rear spar is a Z-shaped channel that extends for the length of the wing. It has very beefy reinforcement bars on the inboard side and additional reinforcement plates where the aileron hinge brackets attach.
First, the reinforcement plates need to be positioned on the rear spar and clamped securely. Once in place, the plates are match-drilled to the holes that are already drilled in the spar.
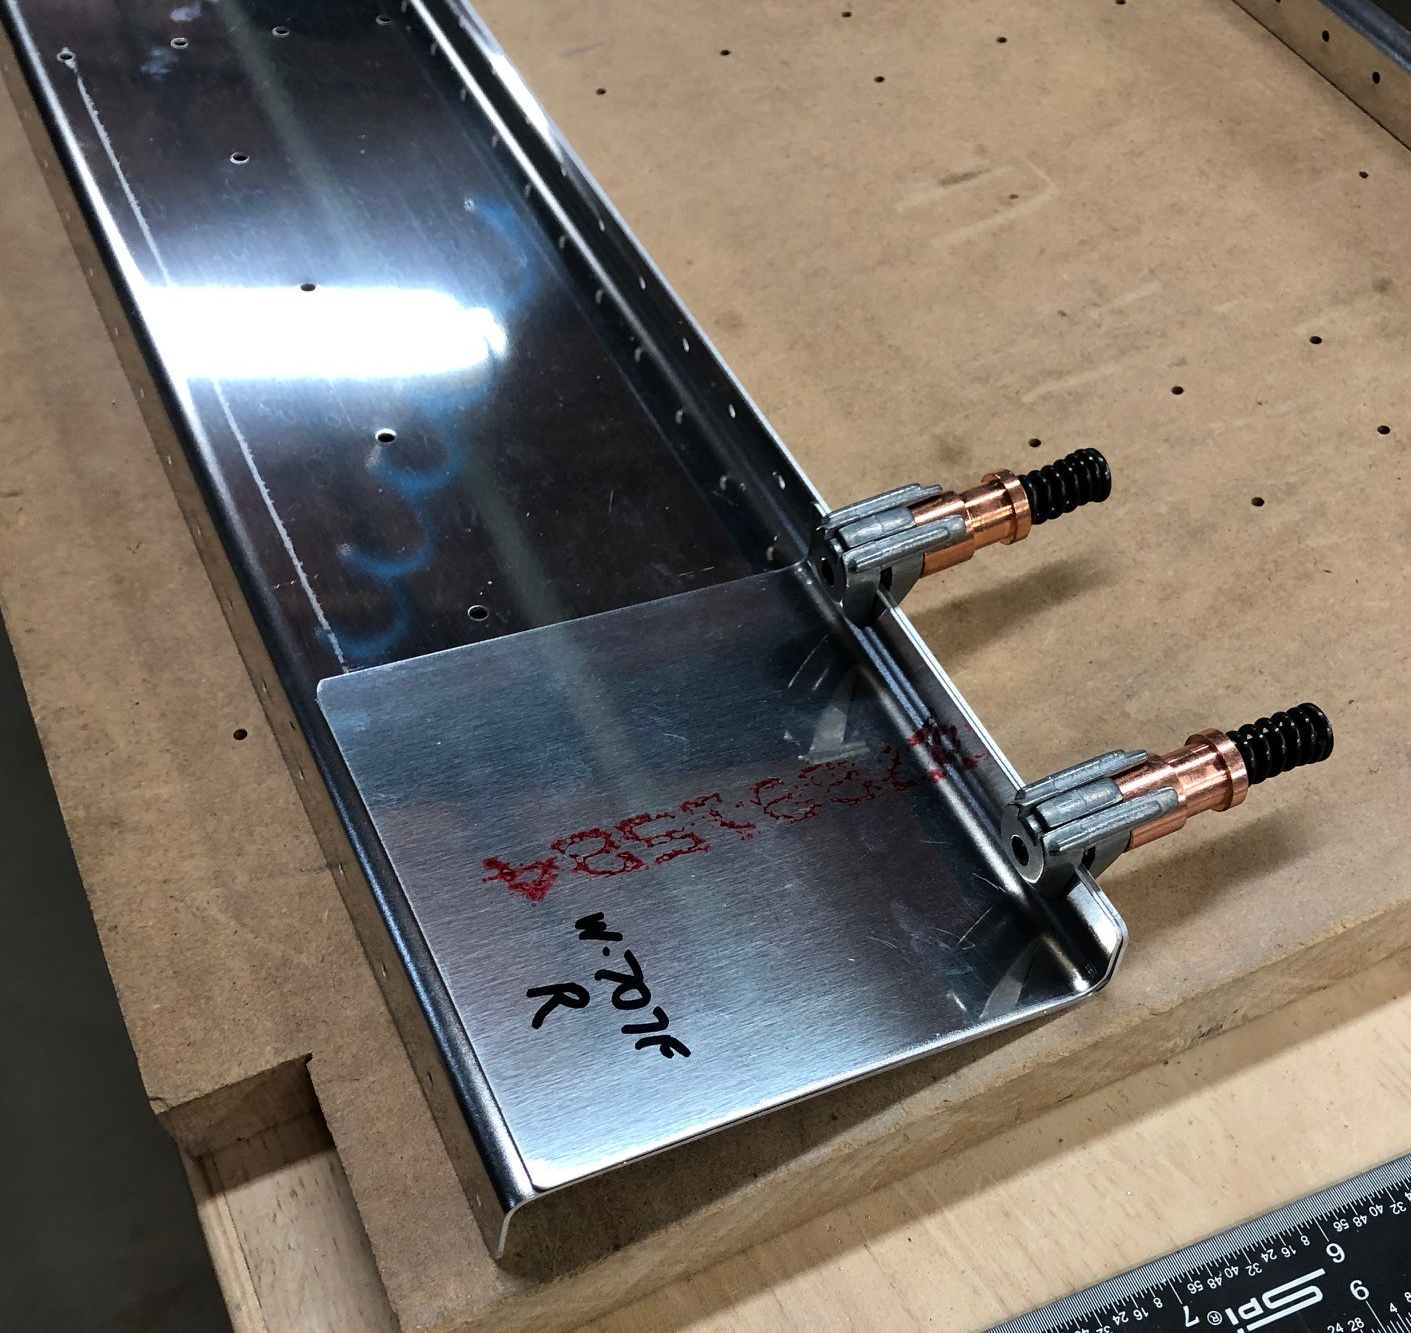
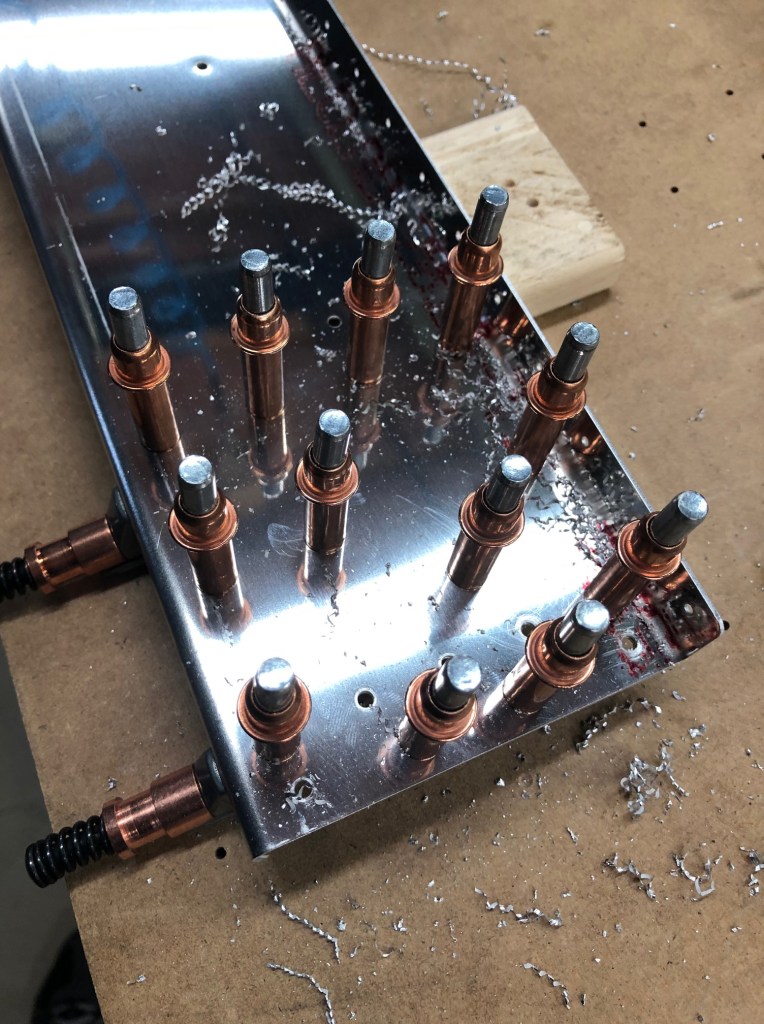
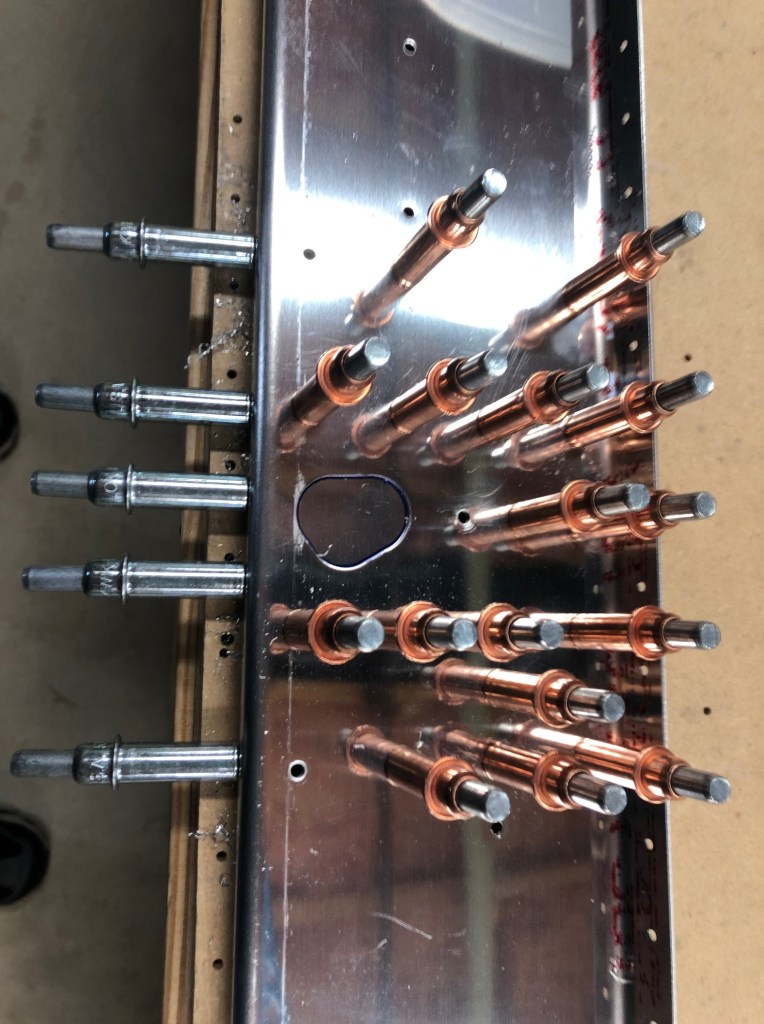
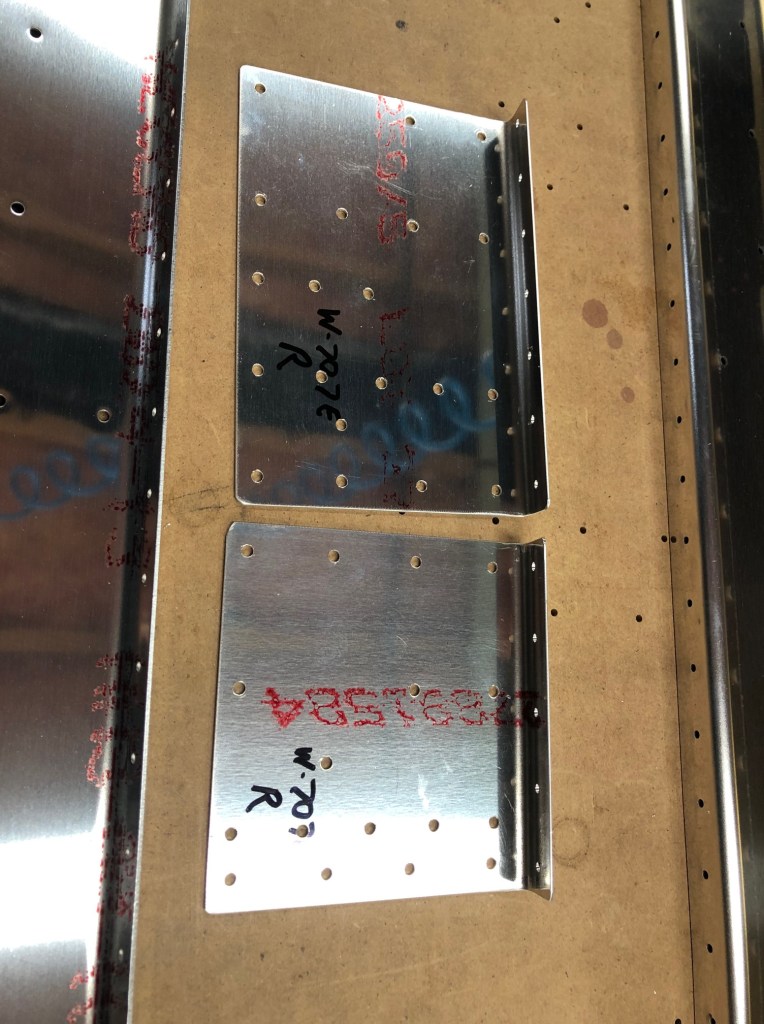
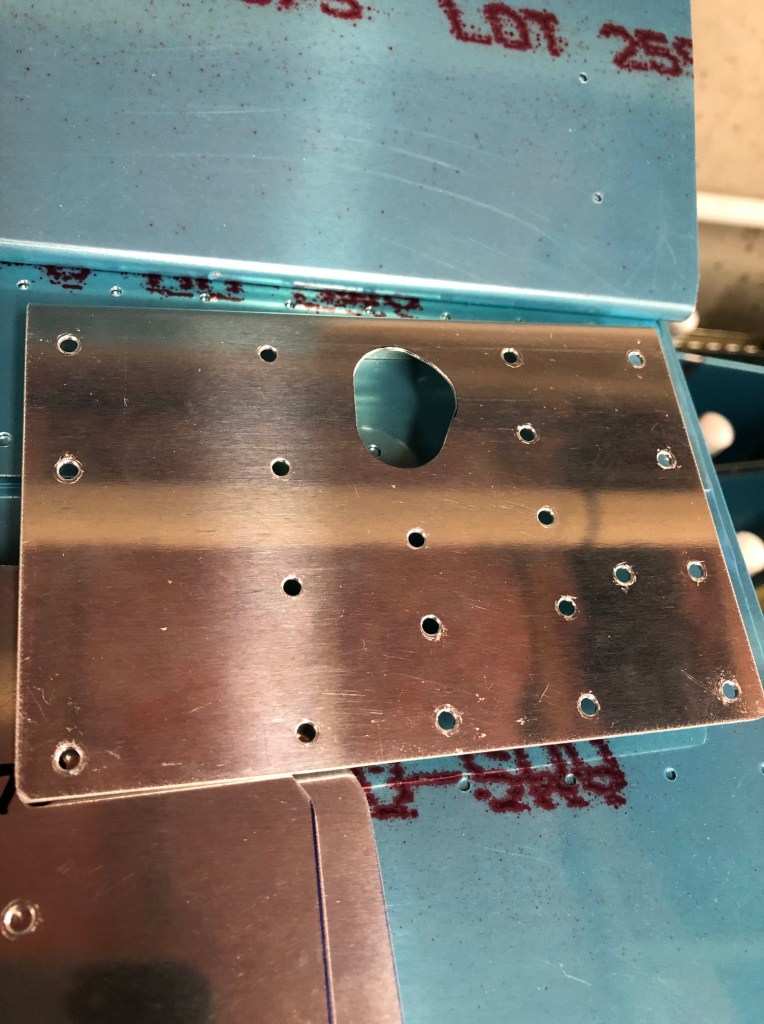
Here are the drilled reinforcement plates:
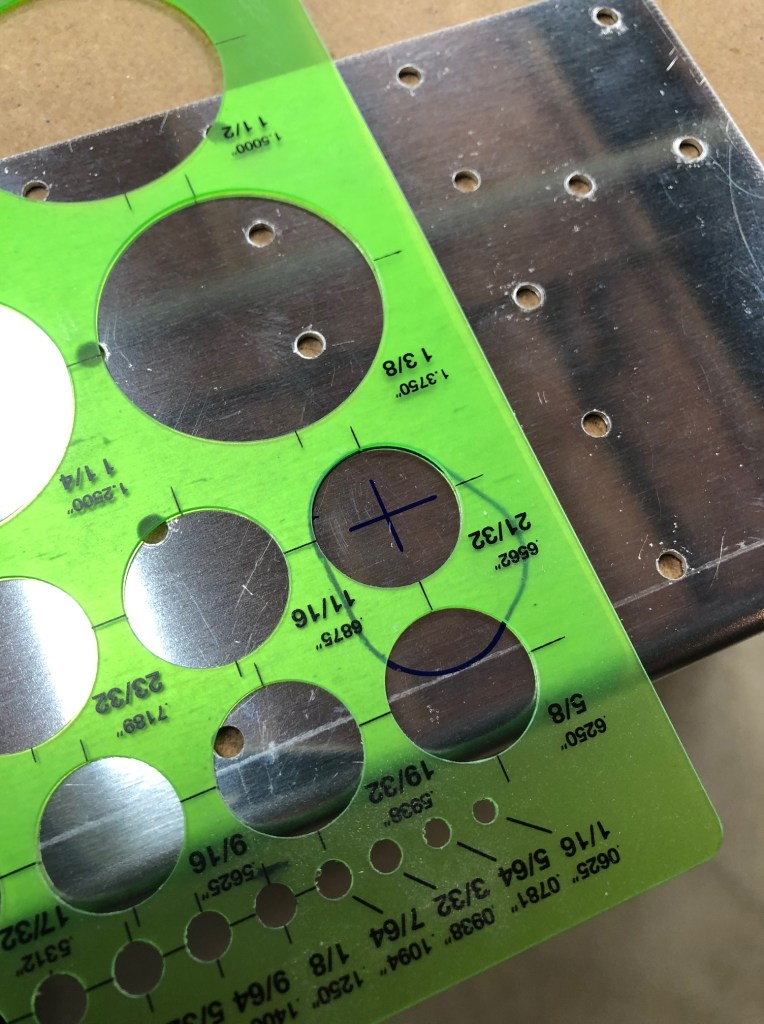
You may have noticed that the spar has an oddly shaped hole that is covered by the center reinforcement plate. That hole is used to allow the aileron push rod to pass through the rear spar. I need to cut a matching hole in the reinforcement plate. Here is the traced outline of the hole on the plate:
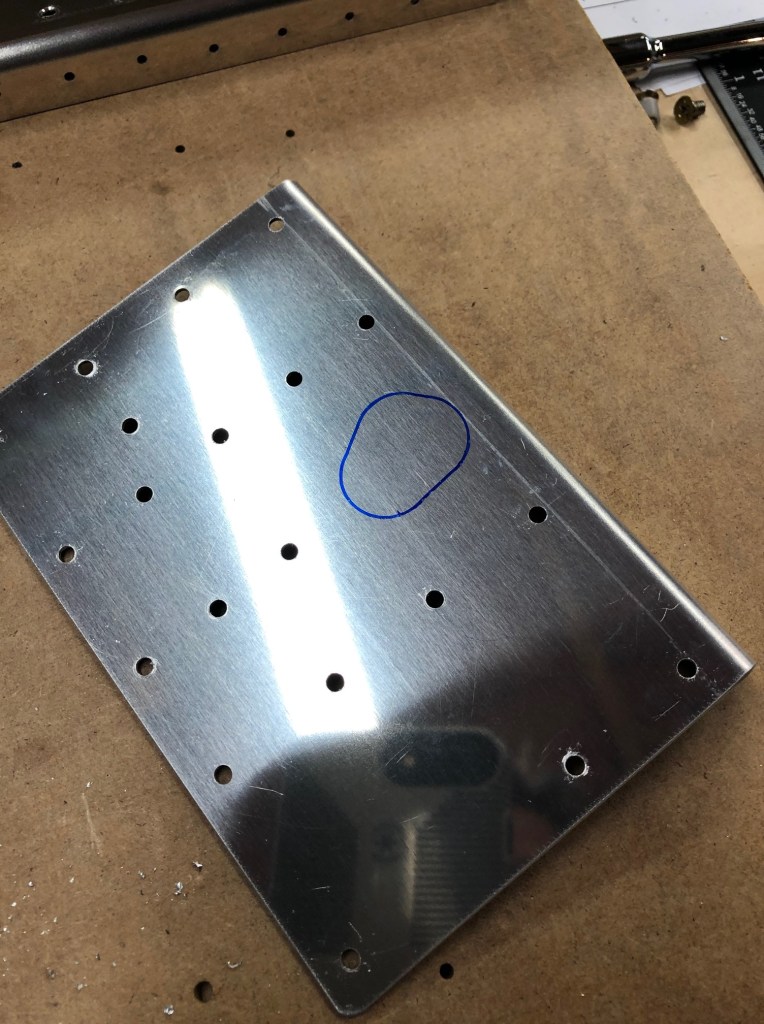
This shape is formed from three large overlapping circles. I’m going to start by marking the center points of each of these three circles using my circle template:
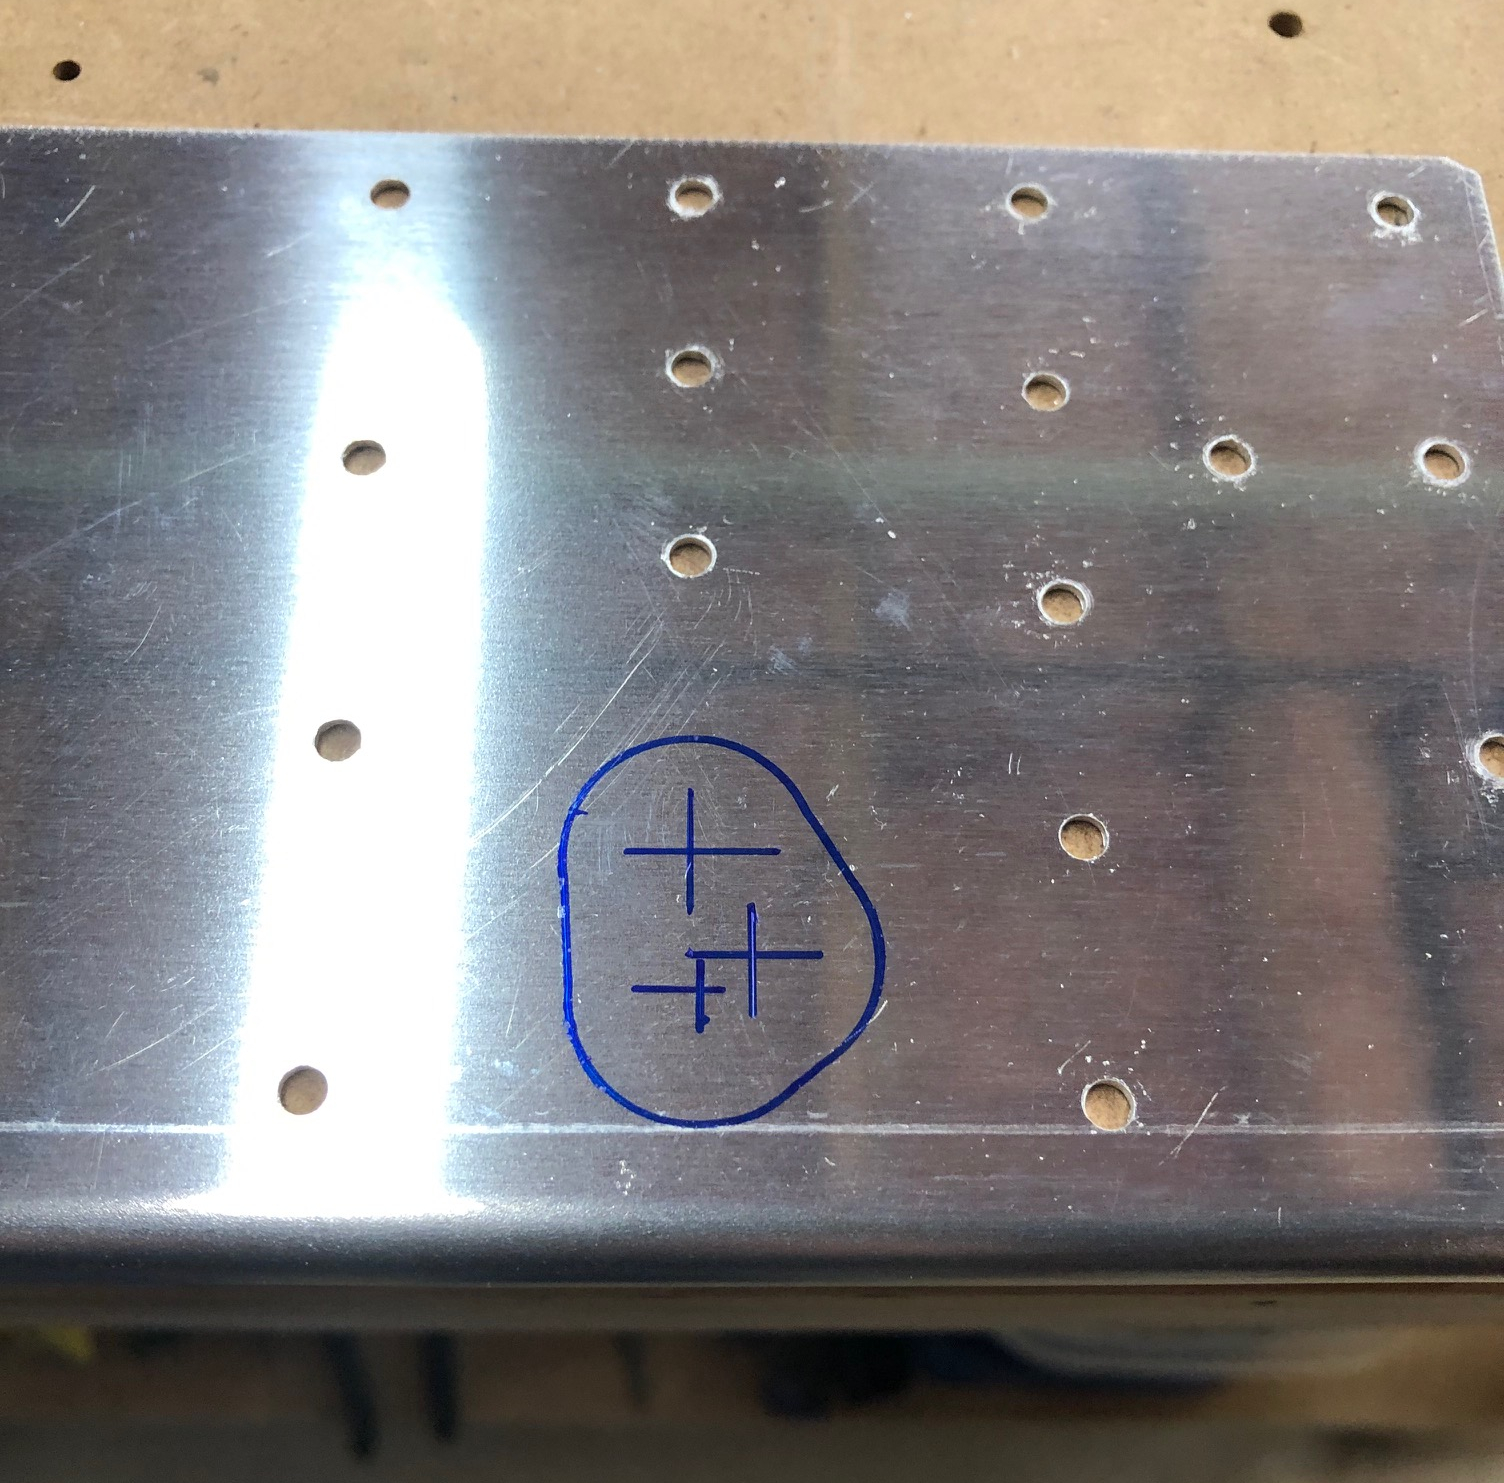
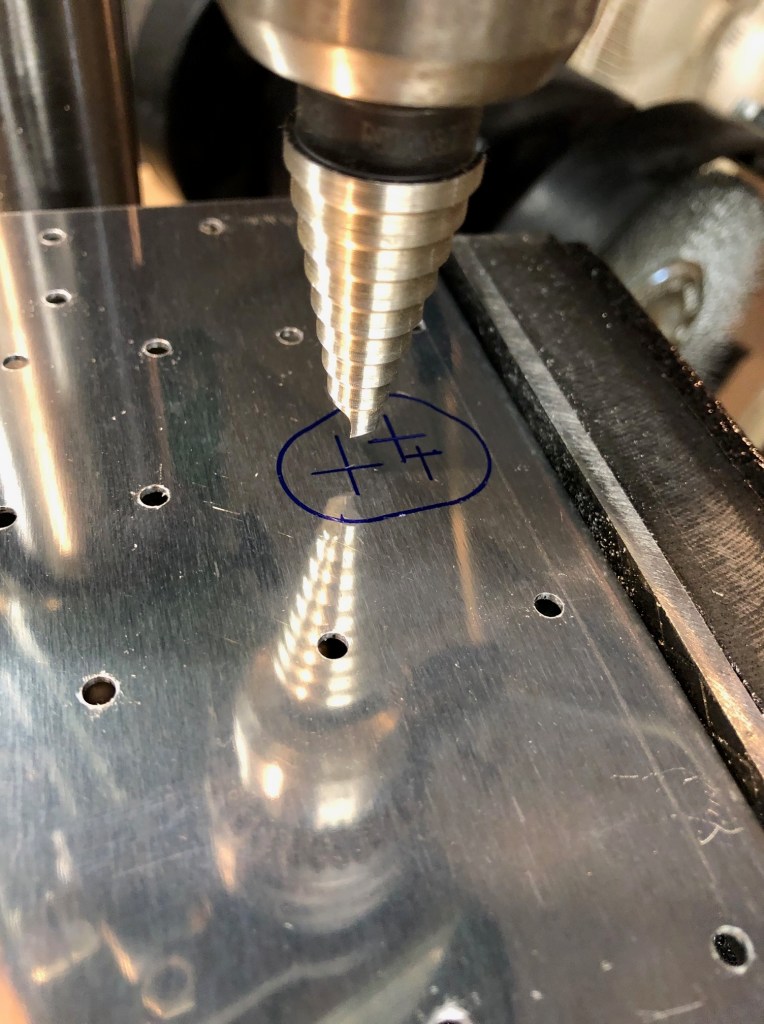
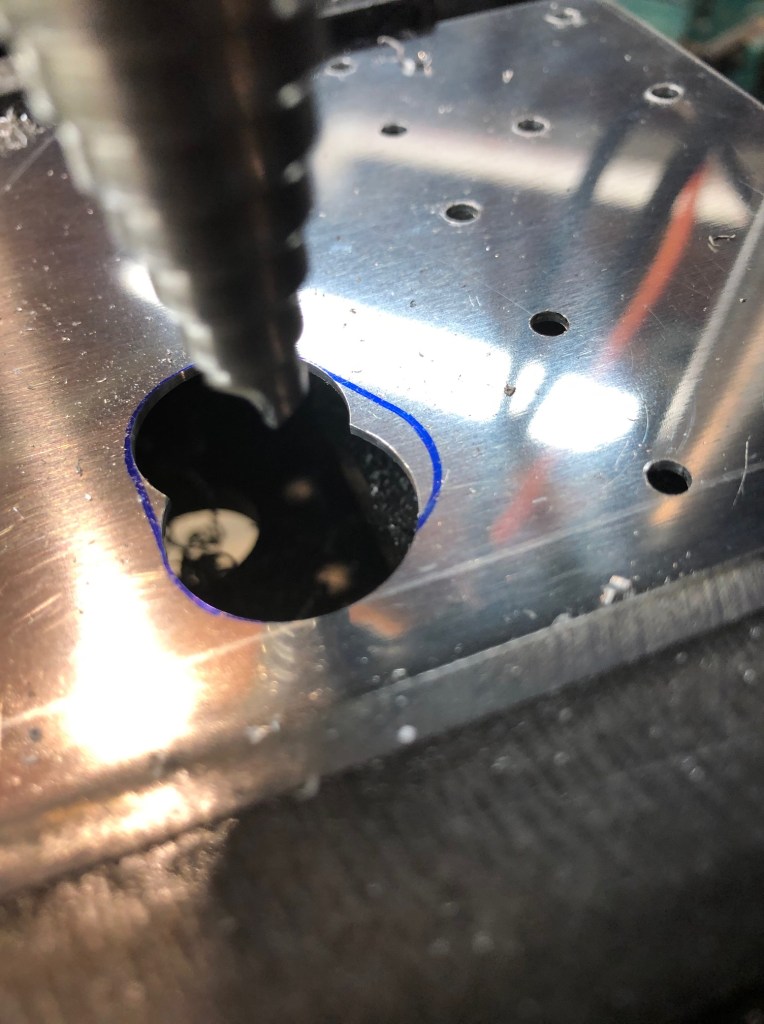
With the centers marked, I then used my step bit to drill out the circles:

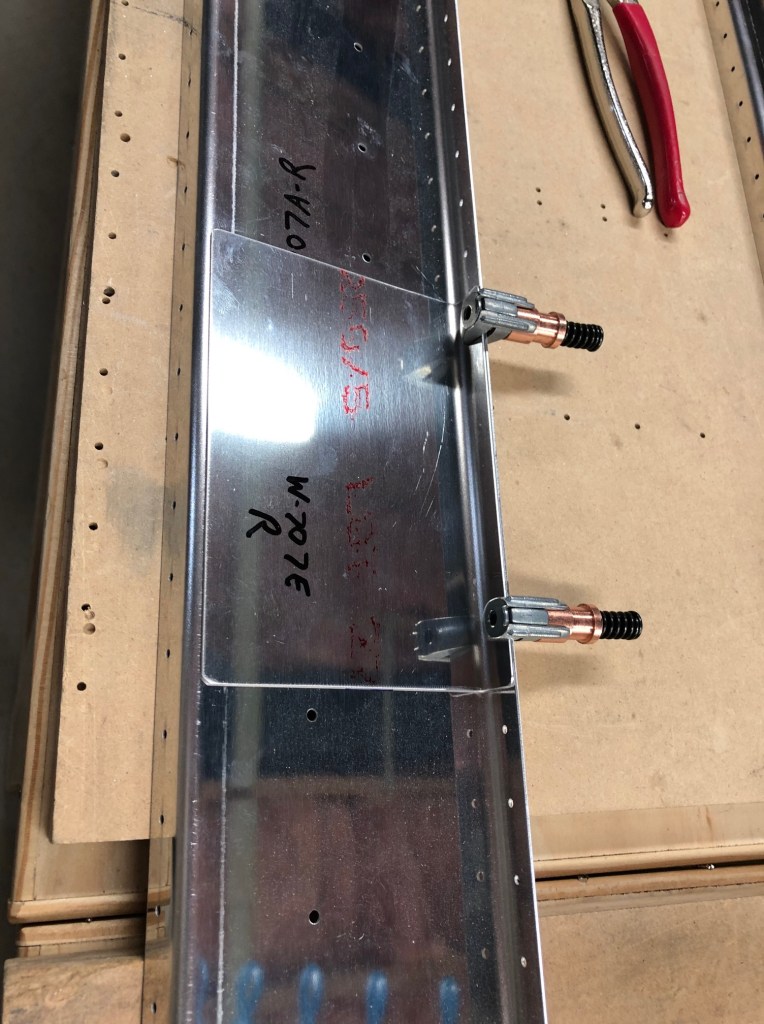
The next thing that needs to be done is to trim the inboard ends of the inboard reinforcement fork/plate. Here is the section of the plans that describes the dimensions of the trimming:
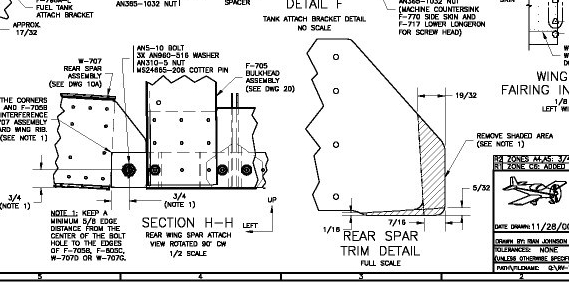
This particular page of the plans is from the fuselage kit and was not supplied with the wing kit. I used gimp (Gnu Image Manipulation Program) to print out this section at full size so I could compare my parts to the outline.
Here’s the untrimmed plate overlaid on the plans:
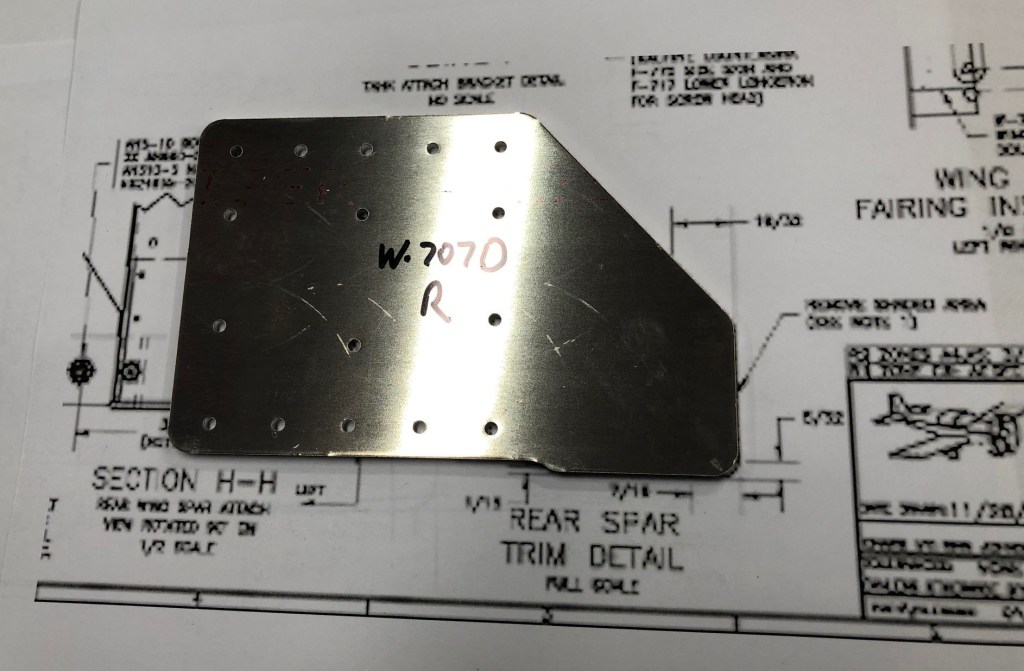
After careful measurement and marking, and remeasurement and re-marking, and finally cutting, sanding, and polishing, it looks like this:
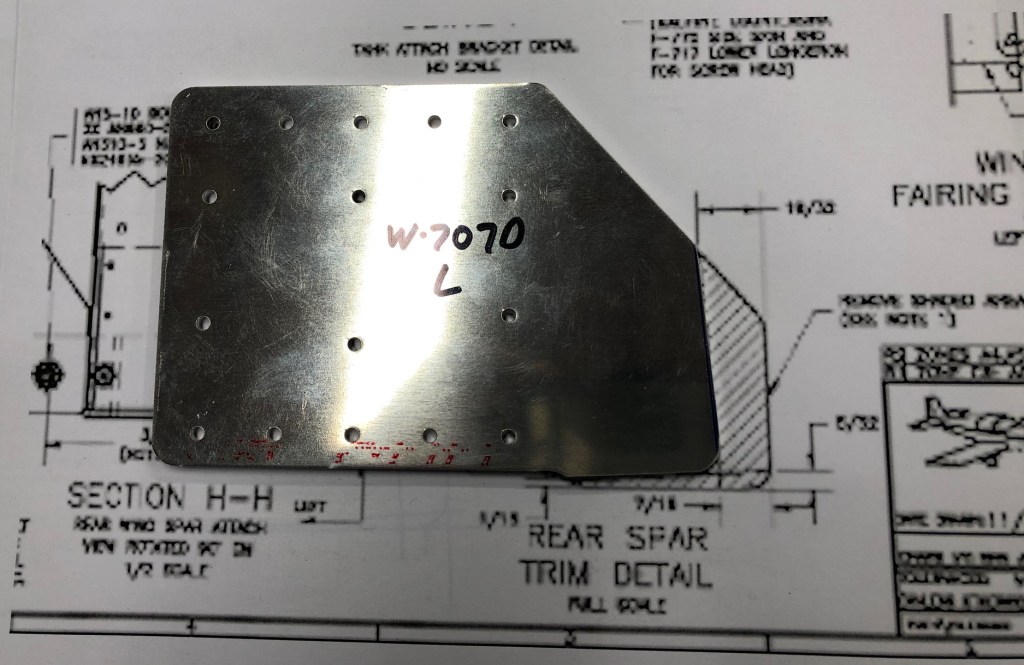
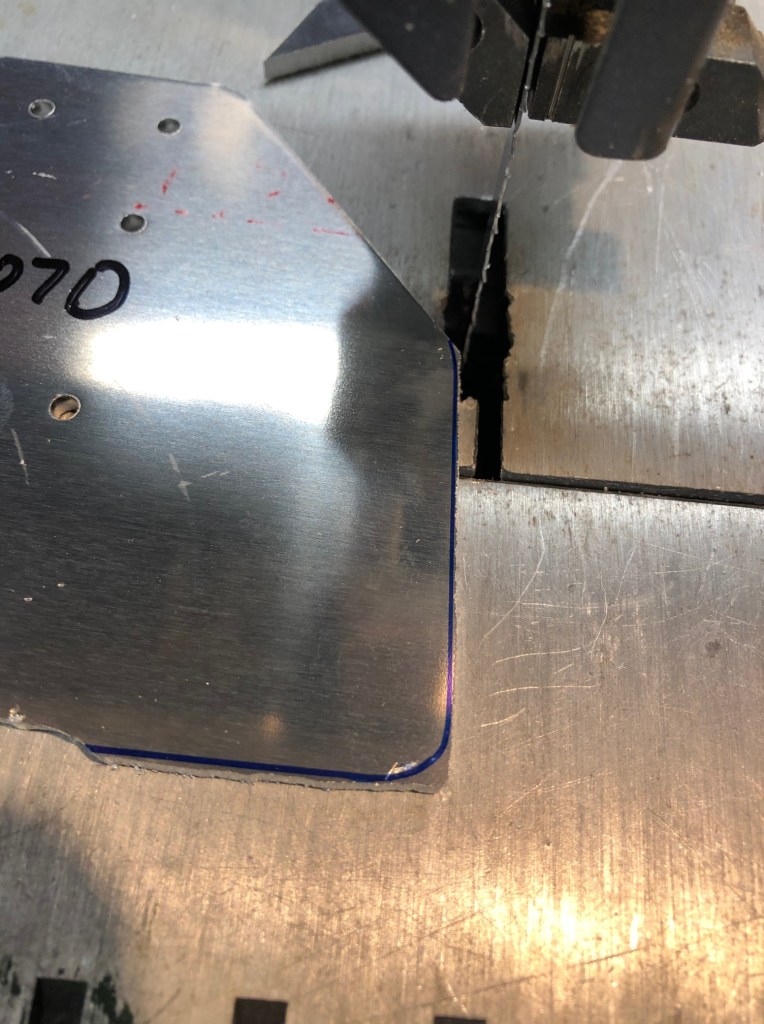
Once I had one good result, I used that as the template for marking and trimming the remaining three parts. I used the band saw to cut away the bulk of the unneeded metal:
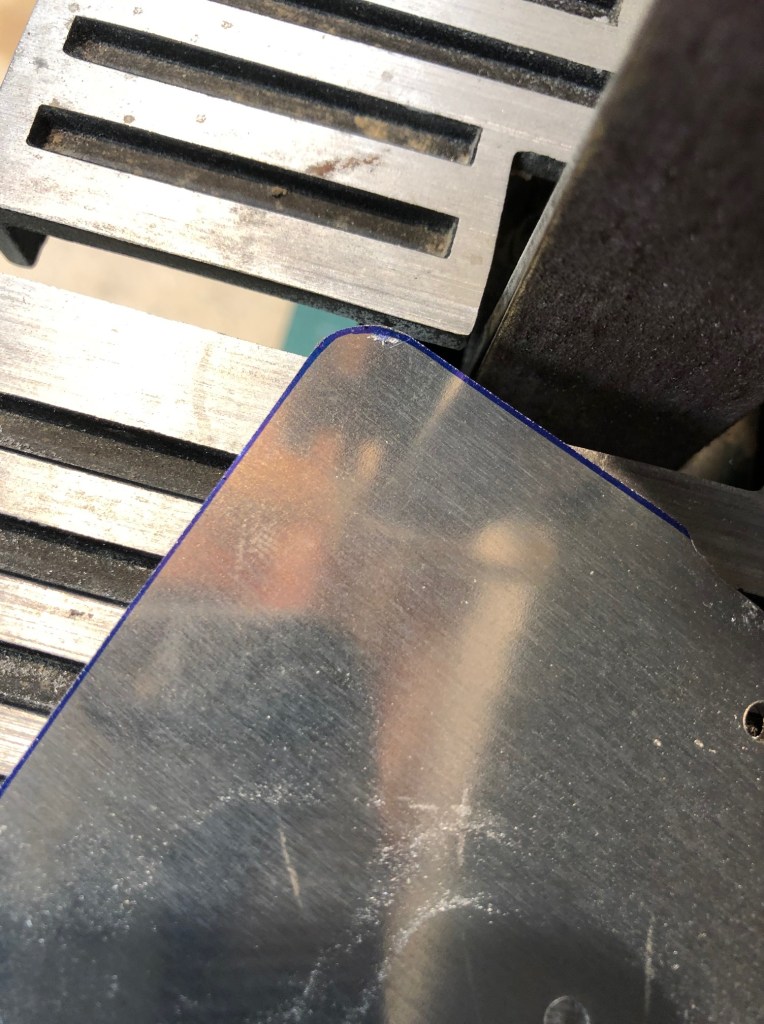
Then on to the one-inch belt sander to dress up the edges and round the corners:
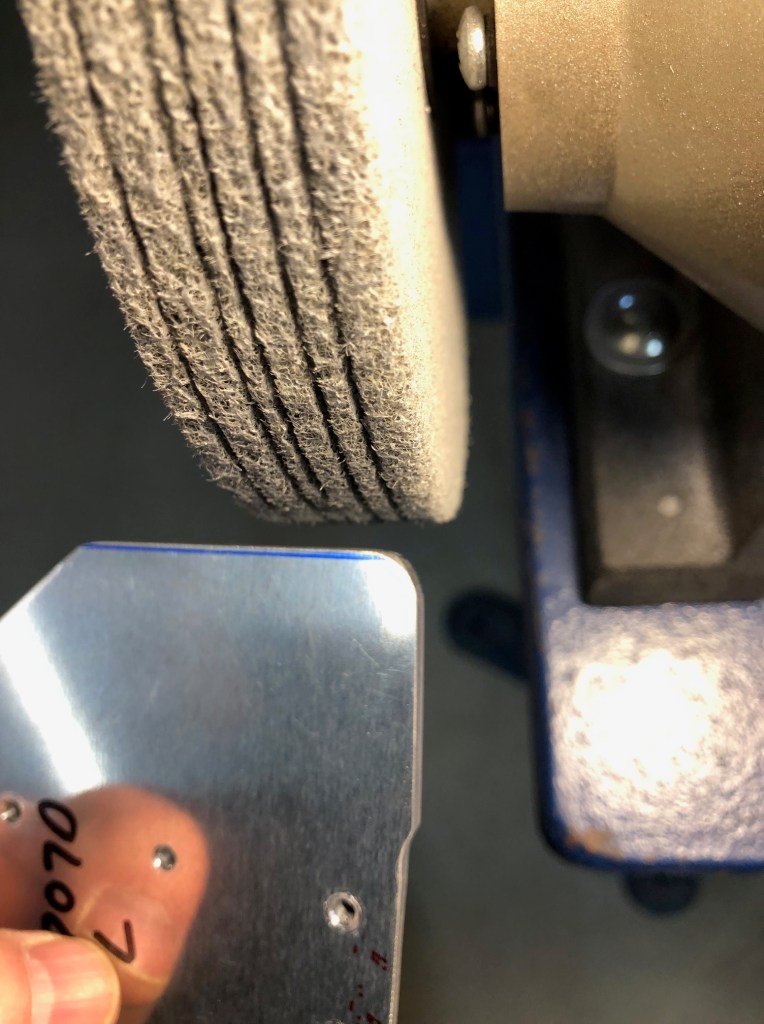
And finally, the scotchbrite wheel to polish and smooth the edges:
Once all of this is done, all of the drilled holes and edges needed to be deburred. These parts can then be set aside for eventual priming and riveting. I’ll save the priming for when the weather is warmer. The next task will be to start prepping the wing ribs.

Thanks, Ted, for your detailed explanations. I won’t ever be able to build an airplane, but I’m learning a lot reading your blog posts.
John
LikeLike